Load Settings Files
Memory channels, Menu screen item settings, and repeater lists can be copied to the transceiver. This function is convenient when copying the saved data, such as memory channels, or repeater lists, to another transceiver, and then operating with the same data.
Common Steps
Step 1: Review Changes
Review and check for the programming version on the Set Revision page. The first channel on your radio, #0, should show the version of the channel set revision that you currently have loaded.
Set Revision
Step 2: Get SD Card Ready
Review the SD Card Settings video for basics on using a SD card in your ICOM ID-4100A or ICOM ID-5100A.
Saving the current data is recommended before loading other data into the transceiver.
SD Card Settings
Step 3: Get Settings File
Download the latest ICF settings file for your radio model.
| Name | Version | Published |
|---|---|---|
| DELCO-ARES-22SEP20-SET-ID4100.icf | 2 | 2021-01-04 21:45 |
| DELCO-ARES-22SEP20-SET-ID51.icf | 1 | 2021-01-04 21:42 |
| DELCO-ARES-22SEP20-SET-ID5100.icf | 1 | 2021-01-04 21:46 |
Radio Programming Files
Step 4: Edit ICF File (Optional)
If you desire, you can open up the ICF file in ICOM Cloning Software to make any changes desired.
ICOM Cloning Software Manual
Step 5: Copy Settings File to SD Card
- Power off your ID-4100 or ID-5100 and remove the SD card.
- Insert SD card into your computer/laptop.
- Copy the file from Step 1 into the \ID-4100\Setting\ folder for the ID-4100 or \ID-5100\Setting\ folder for the ID-5100 on the SD card.
- Eject the card from your computer, insert back into the radio, and power it back on.
Continue with the steps for either the ICOM ID-4100A or ICOM ID-5100A below.
Steps for ICOM ID-4100A
Step 6: Load Settings File
- Push [MENU].
- Rotate [DIAL] to select “SD Card,” then push [ENTER/SET].
- Select “Load Setting,” then push [ENTER/SET].
- Select a file to load.
• Displays the LOAD SETTING screen.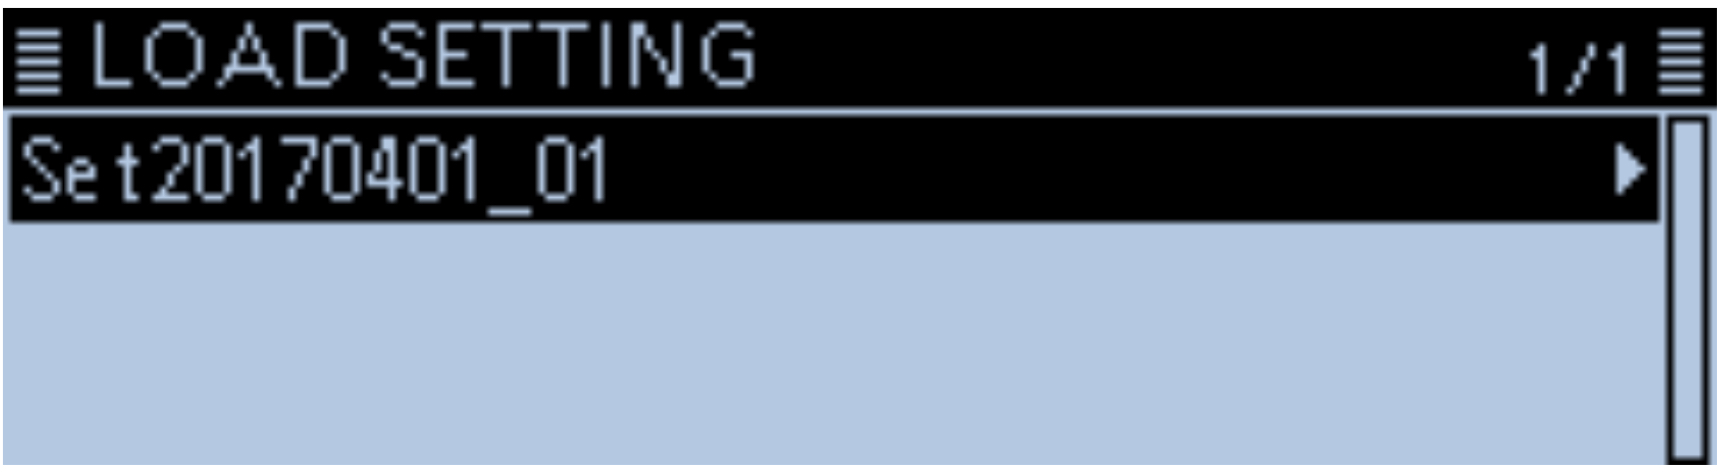
- Select the loading option, then push [ENTER/SET].
• ALL: Loads all memory channels, Menu screen item settings and the repeater list into the transceiver.
• Except My Station: Loads all memory channels, Menu screen item settings and the repeater list except MY call signs and TX message into the transceiver.
• Repeater List Only: Loads only the repeater list into the transceiver.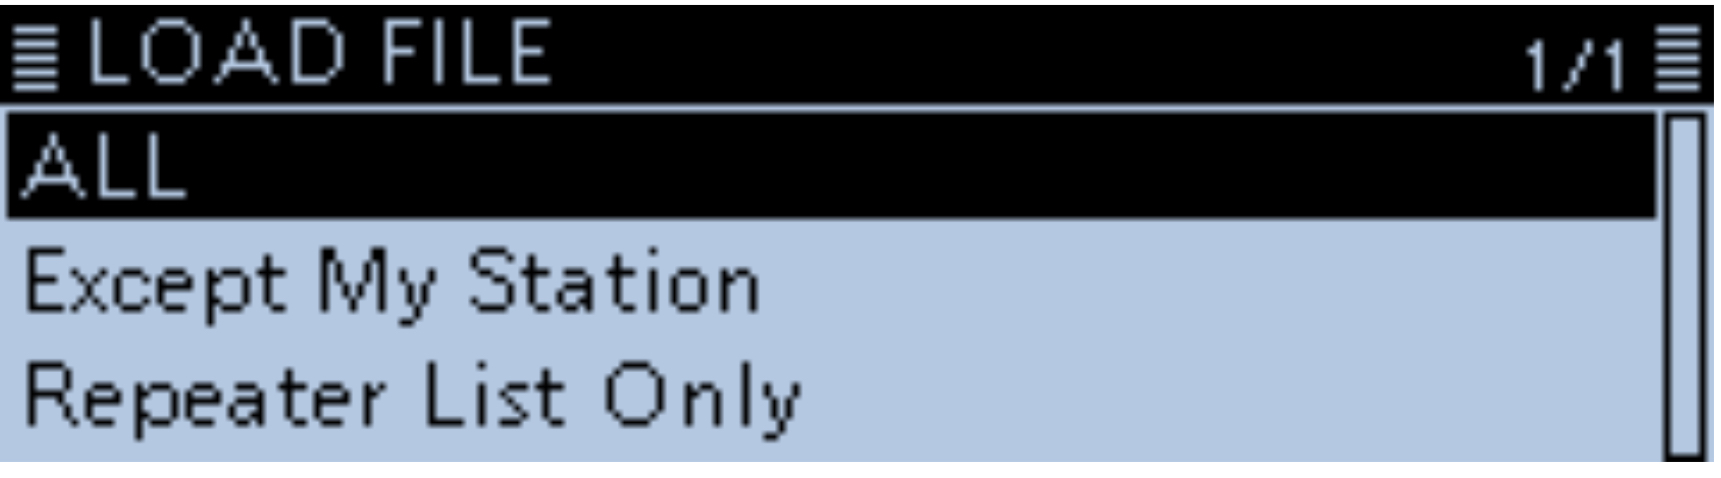
• The confirmation dialog “Keep 'SKIP' settings in the Repeater List?” is displayed. - Select <YES>, <NO> or <Cancel>, then push [ENTER/SET].
• YES: Retains the skip settings of the repeater list.
• NO: Does not retain the skip settings of the repeater list.
• Cancel: Returns to the LOAD FILE screen.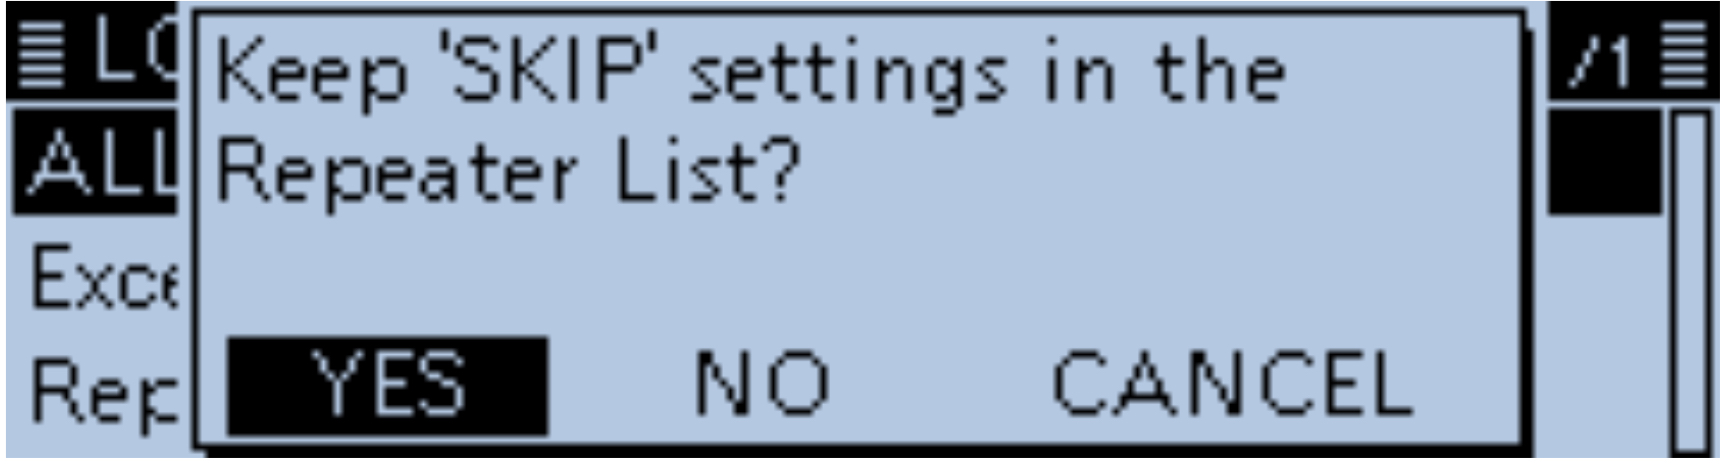
• When you select <YES> or <NO>, the confirmation dialog “Load file?” is displayed. - Select <YES>, then push [ENTER/SET].
• Starts the file check.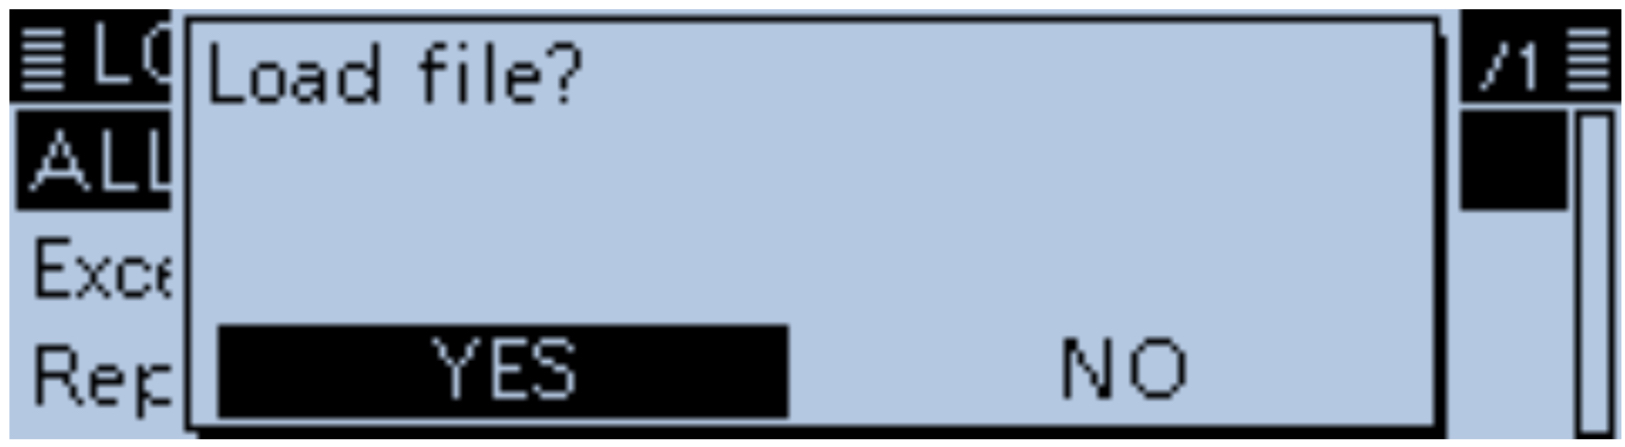
While checking the file, displays “CHECKING FILE” and a progress bar.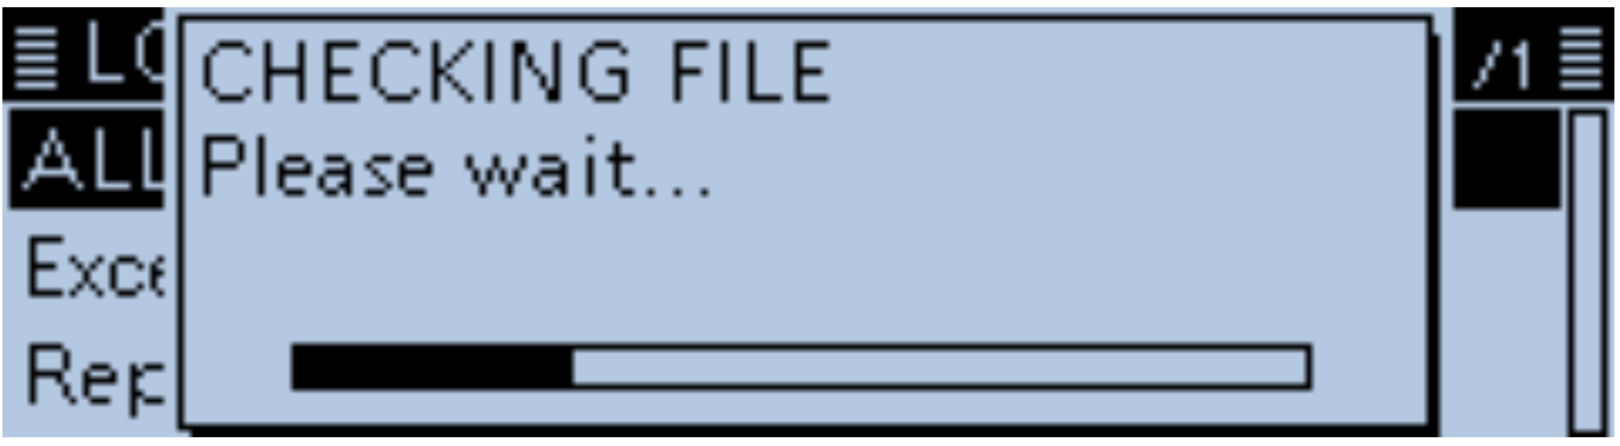
- After checking, settings data loading begins.
While loading, “LOADING” and a progress bar are displayed.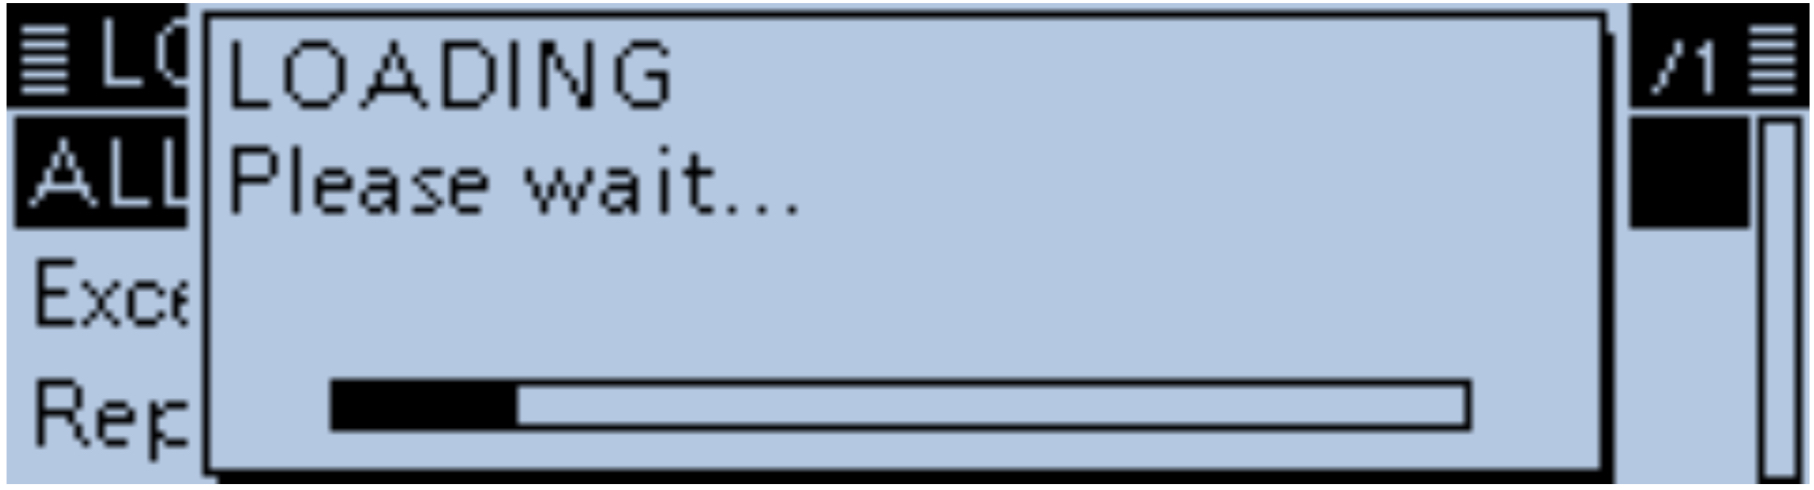
- After loading ends, “COMPLETED!” is displayed..
To complete the loading, restart the transceiver.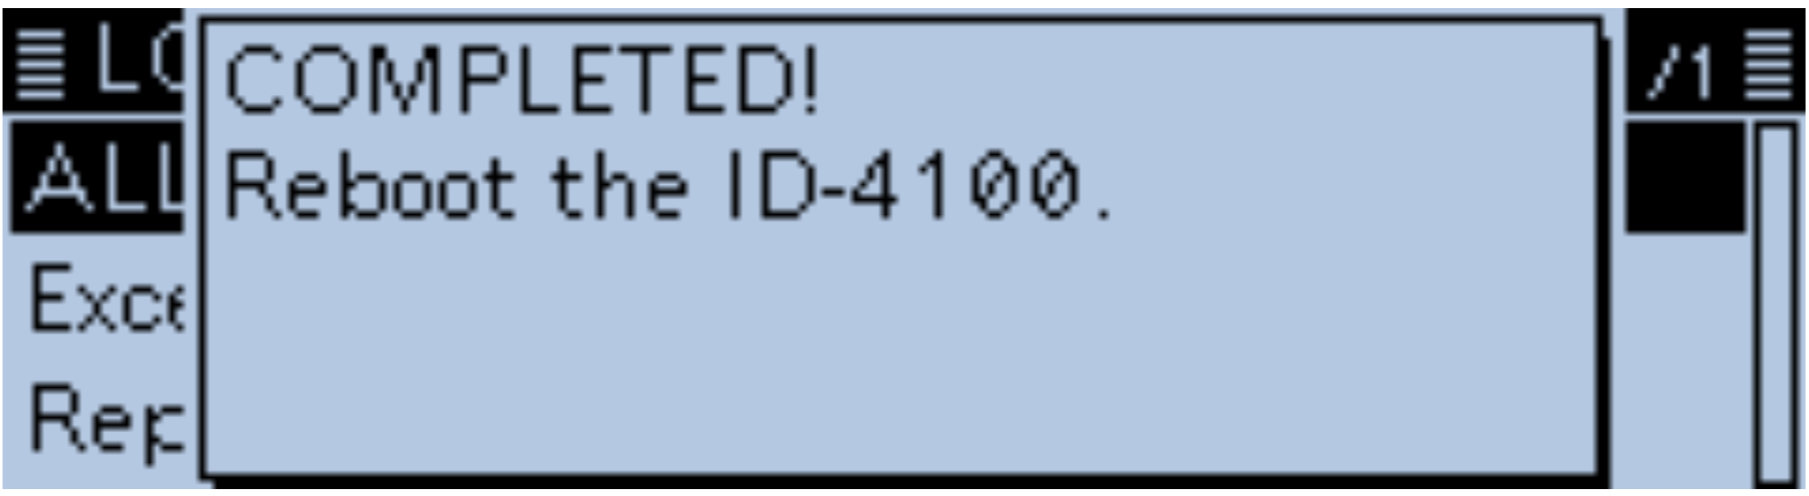
Steps for ICOM ID-5100A
Step 6: Load Settings File
- Touch [MENU].
- Touch “Load Setting.”
(SD Card > Load Setting)
• Opens the LOAD SETTING screen.
• If the item is not displayed, touch [UP ARROW] or [DOWN ARROW] one or more times to select the page.
- Touch the desired file to be loaded.
• The LOAD FILE screen appears.
- Touch the desired loading option.
• ALL: Loads all memory channels, Menu screen item settings and the repeater list into the transceiver.
• Except My Station: Loads all memory channels, Menu screen item settings and the repeater list except MY call signs and TX message into the transceiver.
• Repeater List Only: Loads only the repeater list into the transceiver.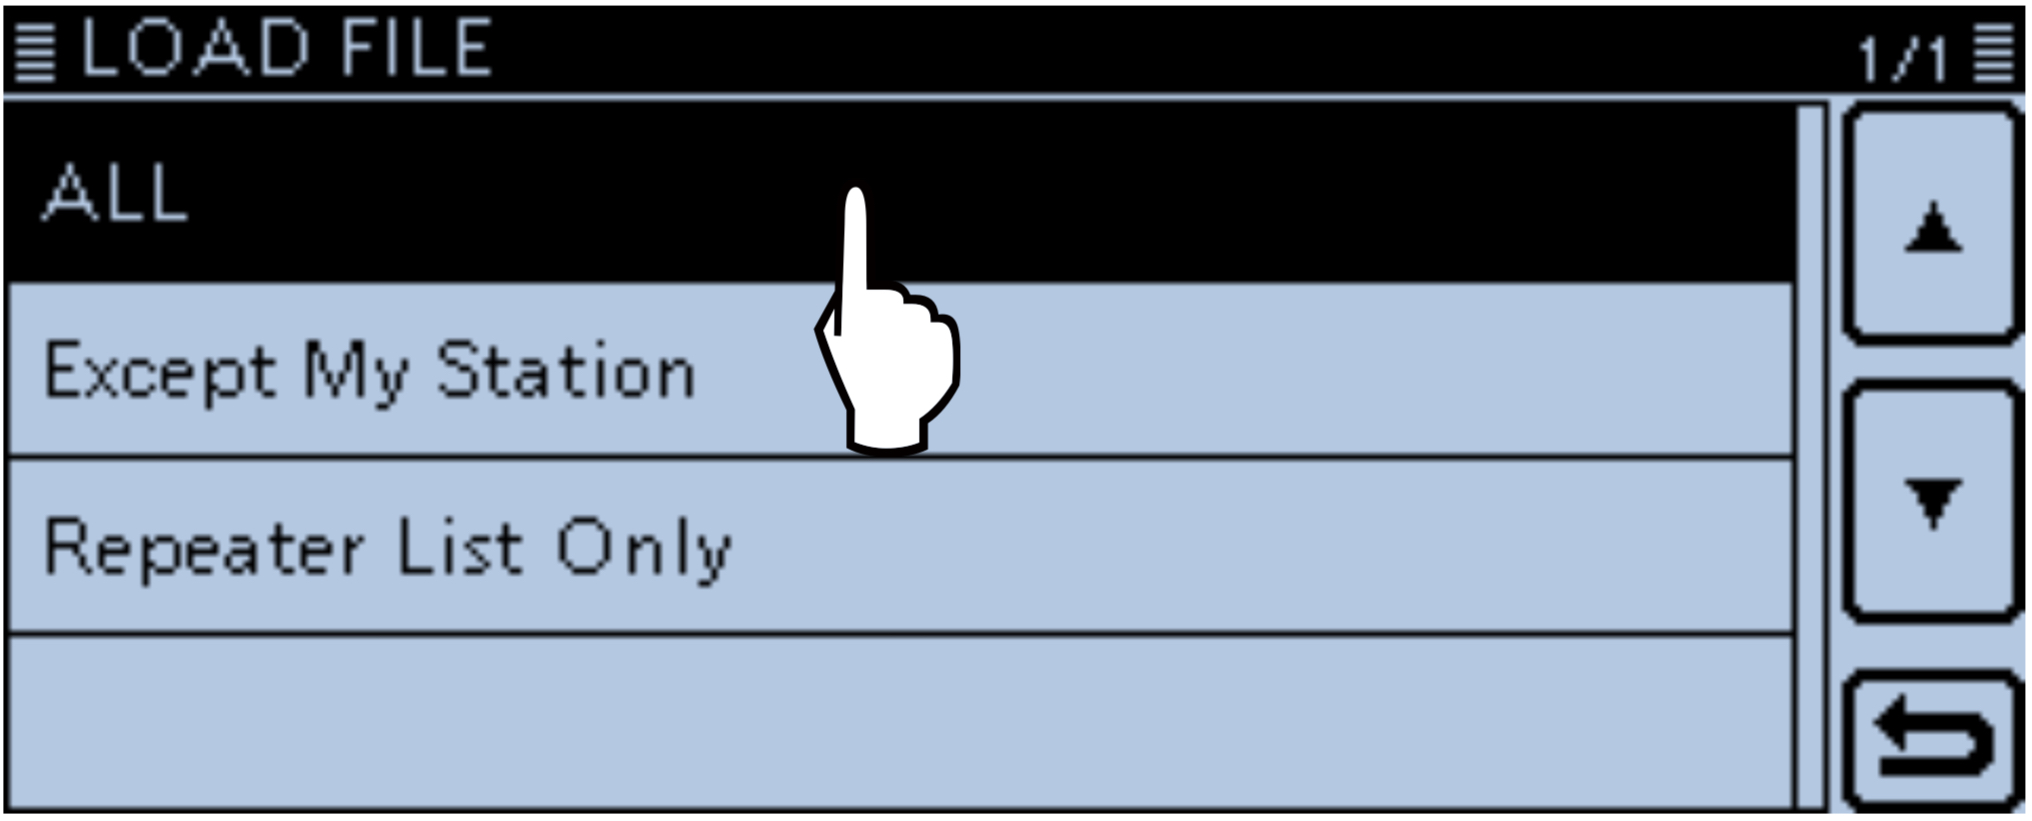
- The “Keep 'SKIP' settings in the Repeater List?” appears. Touch [YES], [NO] or [Cancel].
• Touching [YES] retains the skip settings of the repeater list.
• Touching [NO] does not retain the skip settings of the repeater list.
• Touching [Cancel] returns to the LOAD FILE screen.
• When you touch [YES] or [NO], “Load file?” is displayed.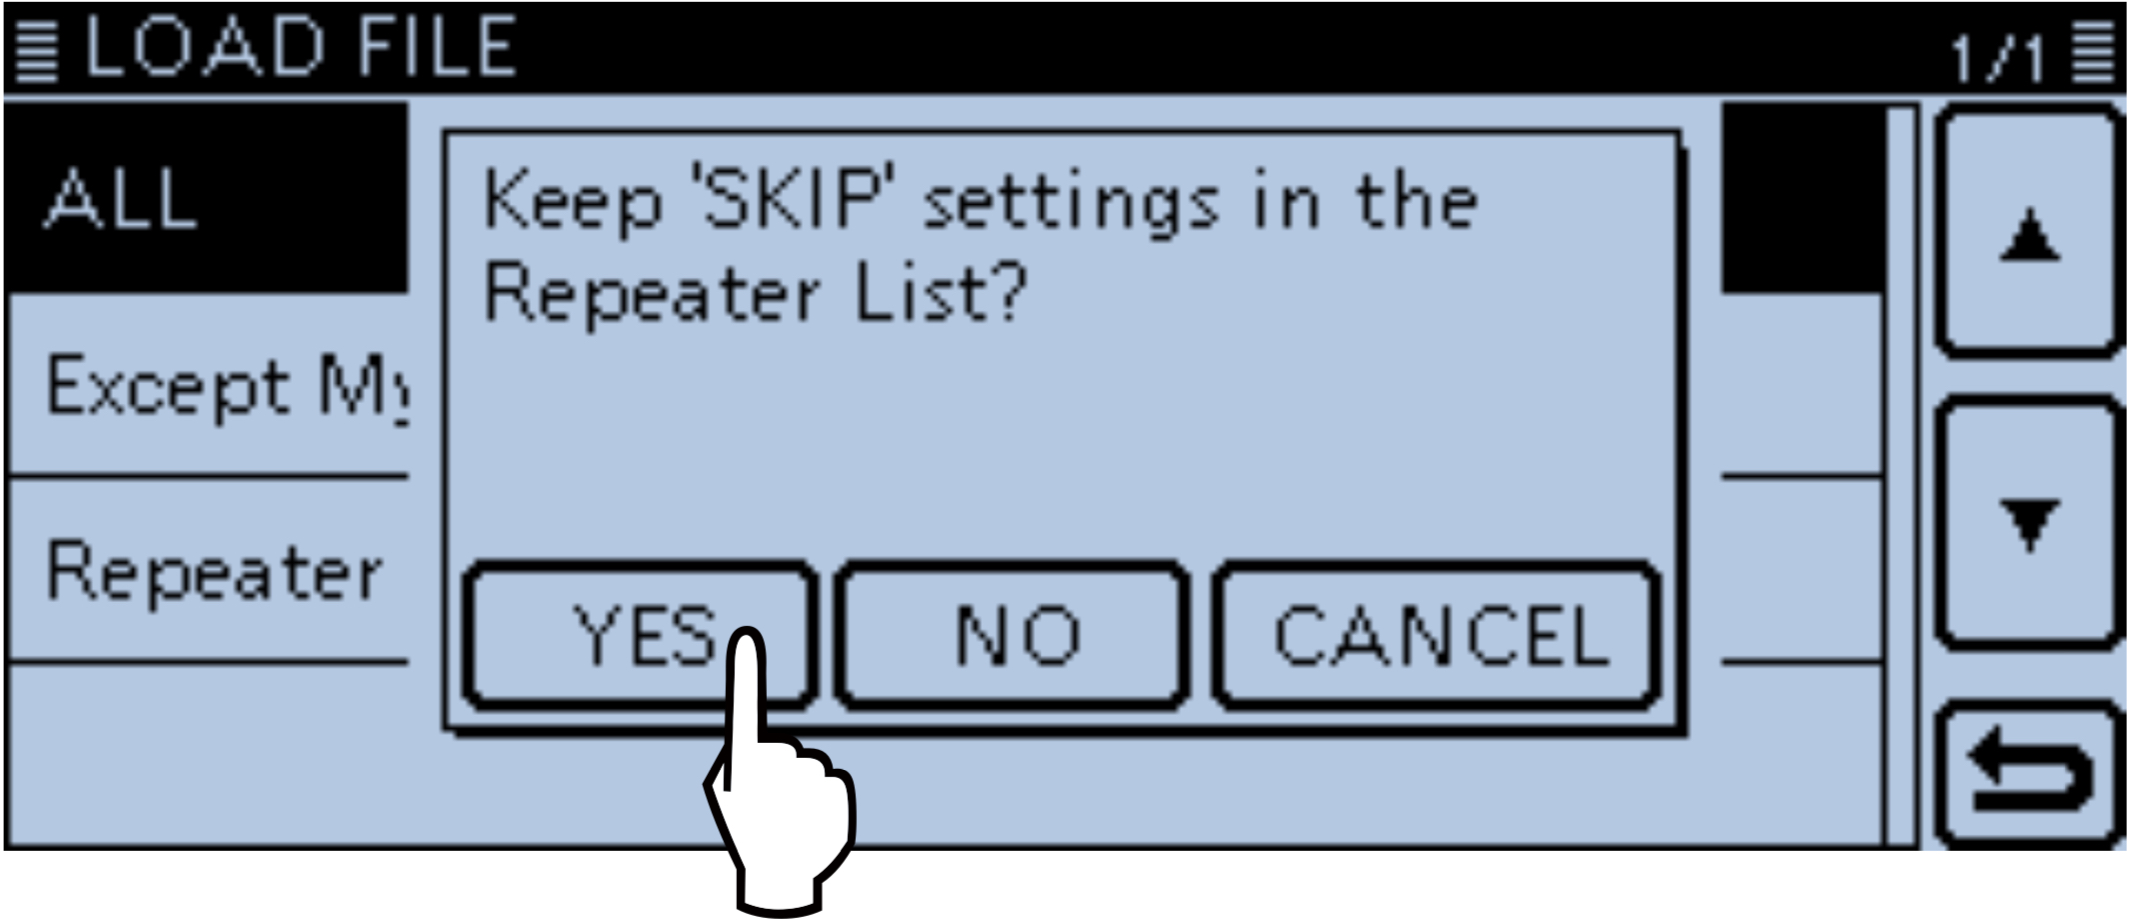
- Touch [YES]
• Starts the file check.
• While checking the file, displays “CHECKING FILE” and a progress bar.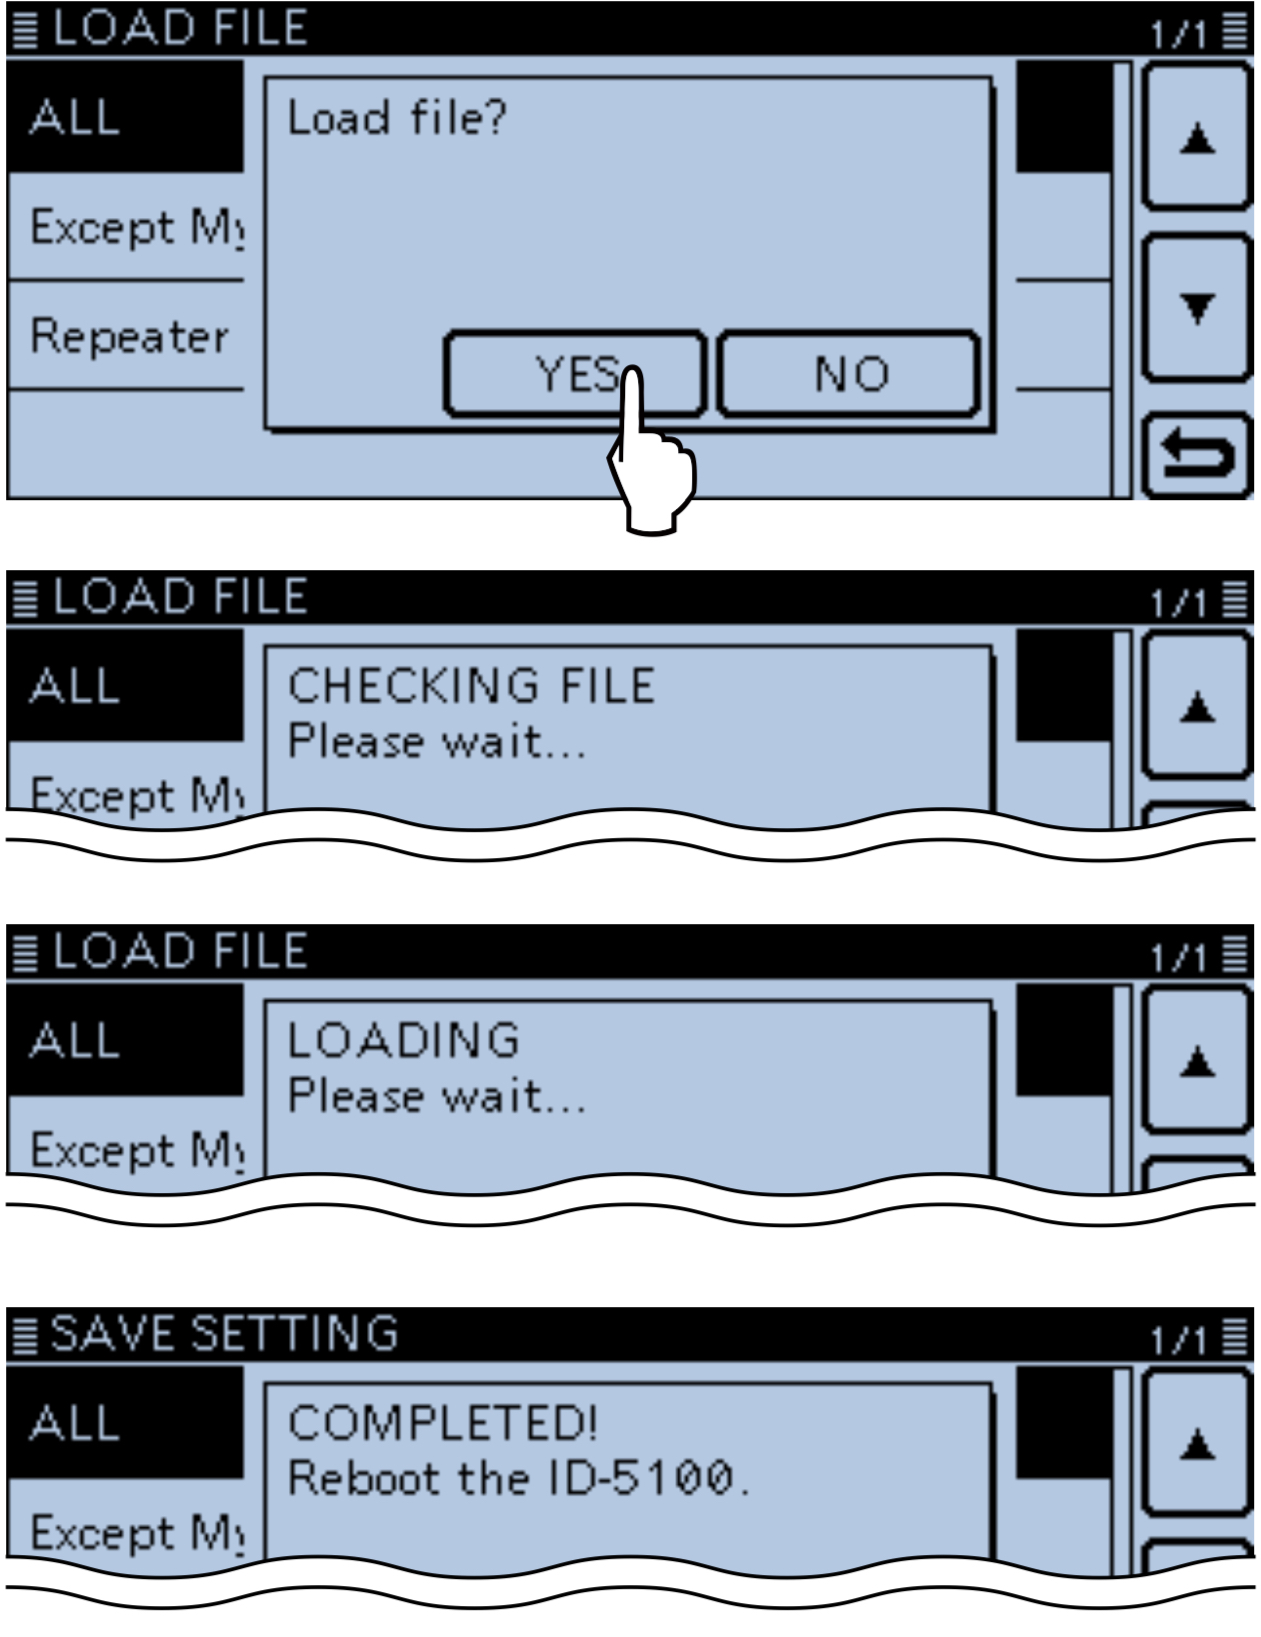
- After checking, settings data loading begins.
• While loading, “LOADING” and a progress bar are displayed. - After loading ends, “COMPLETED!” is displayed. To complete the loading, reboot the transceiver.
Common Steps
Step 7: Update Your Station
Go to the My Station Update page to update your call sign if needed.
My Station Update